Description
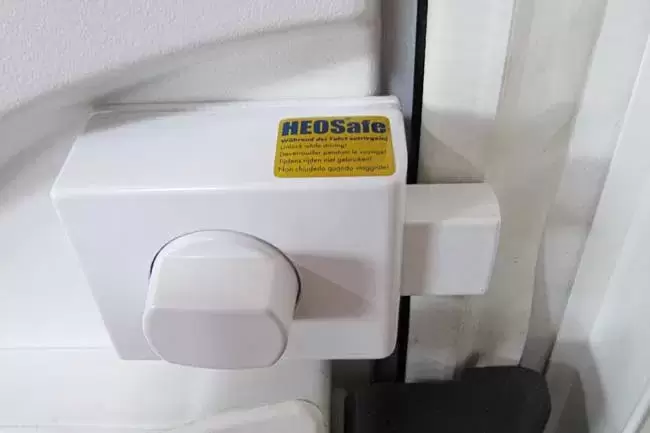
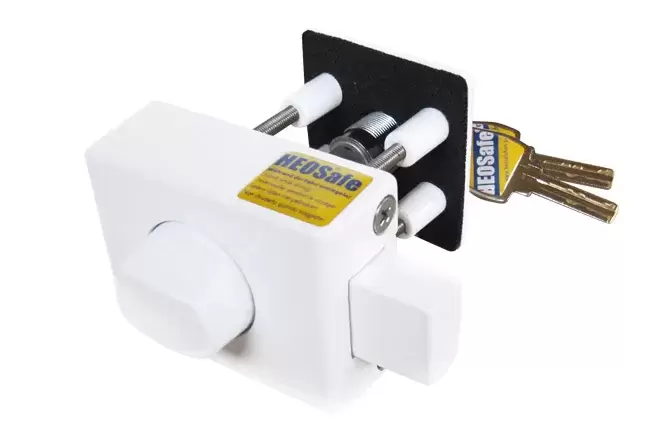
HEOSafe® additional lock specially built for exterior hatches, garage doors, exterior doors not only for motorhomes and caravans, but also for mobile markets and food trucks
Year of construction:
Heosafe® 1958
The extra security lock is suitable for caravan doors, motor homes, rear garage doors and external hatches.
On the other hand, the HEOSafe® 1958 offers additional security for market doors and hatches, food stores and mobile trucks.
INSTRUCTIONS FOR USE AND SPECIFICATIONS
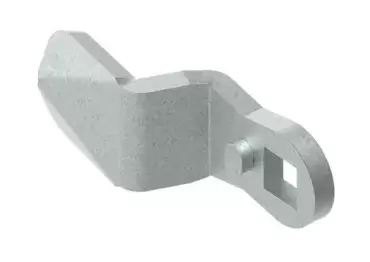
• The lock bar affixes behind the door frame.
• Assembly is very easy: just screw the two parts together (inner and outer casing). No additional reinforcement is required for a secure and solid installation.
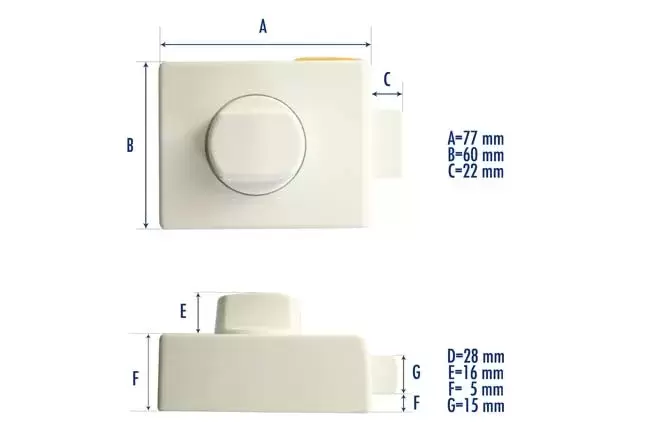
• 5 spacer plates are included in the delivery of our additional lock (Thickness: 3 x 2 mm, 2 x 8 mm for variable adjustment between 2 and 22 mm). With the spacer plates the distance between the door frame and the door can be adjusted so that the expansion gap between the lock bar and the inner door frame remains approx. 2 mm.
• The locks are suitable for a door thickness from 20 to 90 mm (using short or longer screws as required).
• Solid but light weighted by using die cast aluminum.
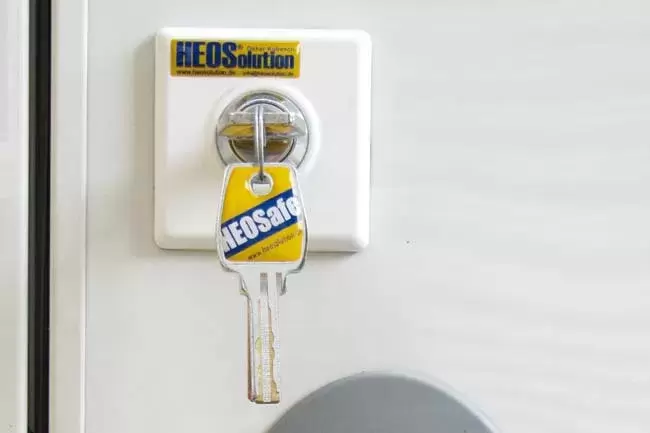
• Special cylinder for security locks with protective cover, robust reversible key.
• The HEOSystem has been developed to open and close all locks with the "one key system.
ASSEMBLY INSTRUCTIONS
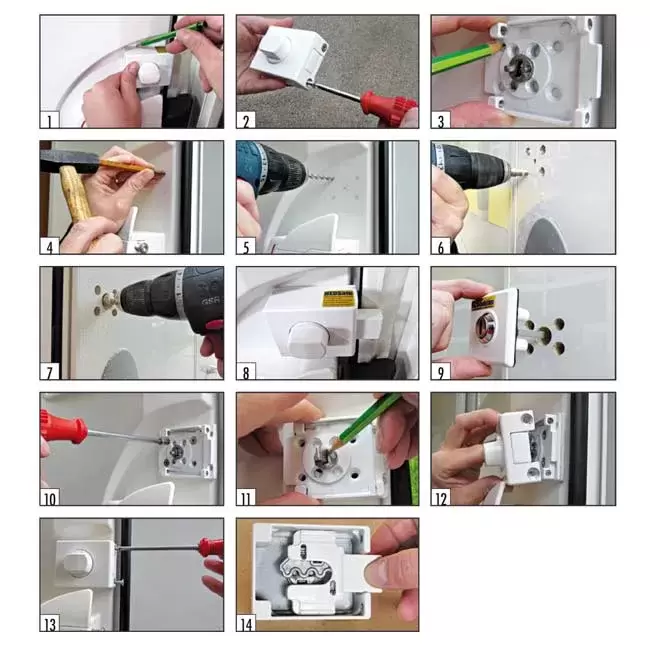
• Close the door. Position the inside of the lock at the desired height on the edge of the door. Please make sure that the distance between the door frame and the rubber seal must be at least 3 mm. Open and close the door to see if everything matches. If the height of the shell adapts until it does. Now mark the upper and lower edge of the inner hatch (image 1)
• Disassemble the interior lock (remove the two M5 x 7 mm screws) (figure 2) and keep the internal plate between the two marks made. Mark the 5 drill holes (4 for fixing the plate, the middle one for the penalty stem (image 3 and 4).
• Drill the holes with a precision 6mm bit (pic 6) and check one more time (the best way to do this is by taking the gasket from the outer gate and keeping it on the outside of the door.
• From the outside it is now deepened with a 12 mm drill bit into the pre-drilled screw holes, but not deeper than 22 mm (photo 7). This measure further increases the stability of the complete locking system.
• The hole for the stem of the penalty is additionally fully drilled with a 20mm bit.
• Adjust the inside of the spacer plates so that the distance between the door frame and the screw (in closed door position) is approx. 2 mm (photo 8).
• Put the outer part of the lock in place (photo 9)
• Screw the inner plate with the spacer plates slightly tight to hold them in place (figure 10).
• Introduce the sentence to contain the interior plate. Mark the protruding part of the stem of the sentence and cut it (the length of the stem of the sentence must be accounted for exactly to the small drive pins (image 11-13).
• If everything fits, tighten the screws. Do not use an electric screwdriver!
OBSERVATIONS
• Basically, the closing direction is clockwise.
• When turning the work screw 180°, all you have to do is turn it counterclockwise (figure 14).